top of page

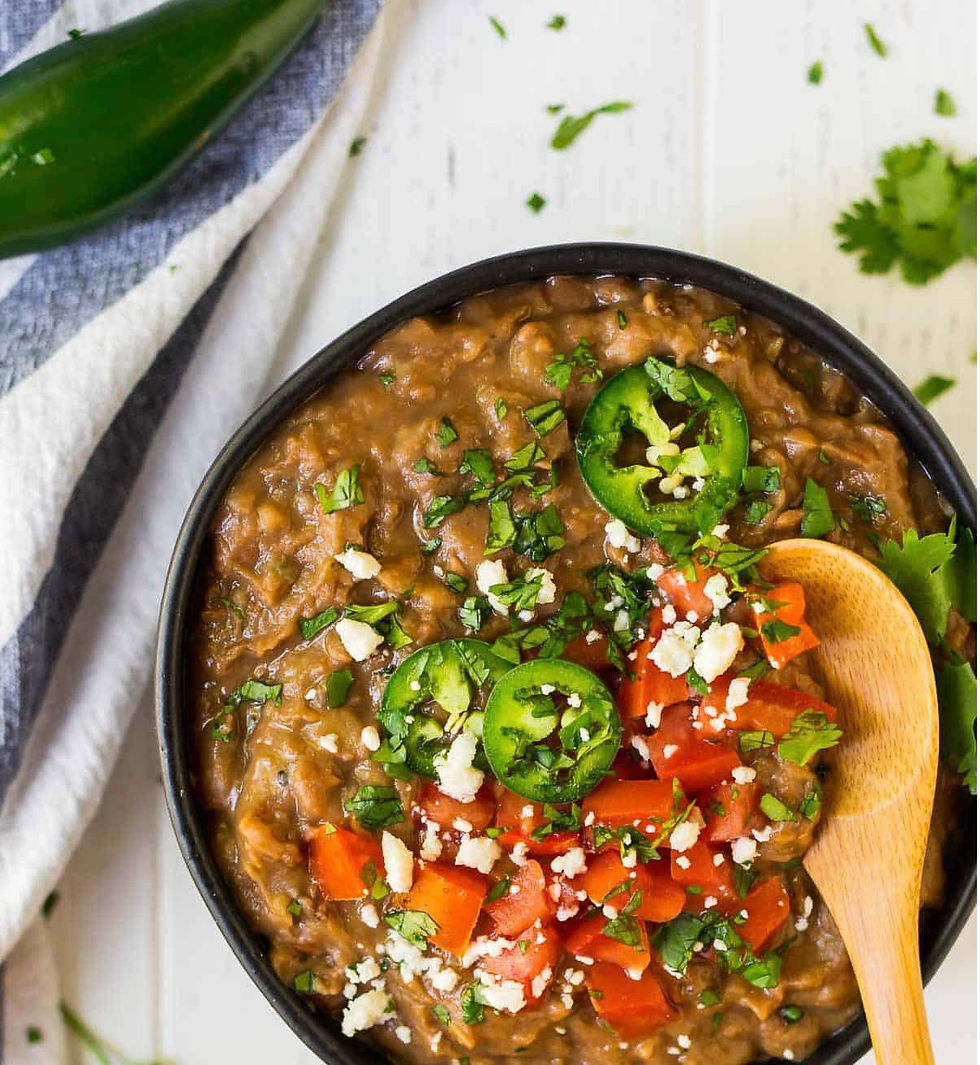
Photo Credit - WellPlated.com

Recipe Credit - Erin Clarke - WellPlated.com


So.... You want to have some Mexican Food and you want to have those refried beans, but you don't want the fat associated with cracking open that can of refried beans (LARD)? Or, you'd like to know what went into that can of vegetarian refried beans - that tastes like... well... something's not quite right with them?


Here's an easy way to spice up your next Mexican meal with a simple Instant Pot recipe.


Try pairing these beans with TheITGourmet Mexican Style Rice (Arroz Con Anything) recipe for your next Taco Tuesday meal.


TIPS:

  1. If you look at the notes / feedback on this recipe, you will see that multiple people have commented that they cook the beans for 90 minutes and that 45 minutes is just not enough time to soften the bean enough.

  2. Do NOT soak the beans - why? well... you don't need to and they tell you NOT to - so I followed the instructions!

  3. Make sure you are careful at the end and drain the cooked beans (reserving the liquid - you'll need some of that reserved liquid). The first time we made this recipe - we didn't do that and mashed the beans in the instant pot's pot. We salvaged the recipe (and maybe made it better) by reducing the liquid in a skillet - Wow! - what a build-up of flavor!

As Always Best Regards and Bon AppetIT!!!


TheITGourmet


Here's a very traditional version of this classic southern French dish that Aileen and I learned when we took our first trip together to Provence. This trip was a "do over" trip to Europe as our "dream" honeymoon to the Amalfi Coast in Italy got cancelled due to the tragic terrorist attacks of September 11, 2001. Anyhow, Aileen and I traveled to France with 5 other women (I might add - this is a much longer yet funny story that we will be happy to share over a nice glass of wine). On this tripe we stayed at a wonderful home (Le Moulin de Silvan) and met our beloved friend Mirielle. Mireille was a special and unique person who exemplified that special joie de vive for which many of the French are known. May she truly rest in peace.


I will warn you in advance, this recipe does NOT fit the normal TheITGourmet principles of low complexity, few ingredients, and can be prepared relatively quickly - it's not a highly difficult recipe to prepare, but it will take some time. But what I will tell you is that the results of your time and effort will produce a high quality Bouillabaisse that is delicious and should impress your family / guests.


TIP: And this is an important one - make sure you have plenty of bread (for "sopping" up the broth) because you are not going to want to leave anything behind on your bowl.


NOTE: The fish listed below


Serves 8 – 10


Ingredients

  • 9 lbs Assorted varieties of fish for the Bouillon and for Eating - including but not limited to rascasse – a.k.a. rockfish or scorpion fish, weever, gurnard, daurade, grunion, mullet, John Dory (St. Peter fish), conger eel, monkfish. NOTE: Divide the fish into two types of fish – ones for the bouillon (i.e., stock or broth) versus the filets for eating with the broth.

The Bouillon Fish – Rascasse, weeverfish, and gurnard - If in Southern France (yes, we have been known to take this recipe with us when we travel) - these fish are easily found in the supermarkets and outdoor markets (tell your fishmonger you are making bouillabaise and they will provide you the fish and also spend 10-15 minutes telling you their favorite recipe and technique for making it. Here in the United States, it's highly unlikely and probably cost prohibitive to find and cook with the fish listed above.


However, what I typically have done is make my bouillon with the heads (YES - heads) and bones of Salmon, Cod, Grouper, and other fish species that my local fish counter has available (ask them, they will either sell them low cost, or happily give them to you. Although not the authentic French fish, they will still make a quality stock.


The Eating Fish – Daurade, Grunion, Mullet, John Dory, Conger Eel, and Monkfish. I would suggest finding many different kinds of fish that you like (except I do NOT recommend Tilapia).


For the Bouillon (or fish fumet / stock)

  • 3 Large White Onions

  • 3 Leeks – coarsely chopped (white and light green)

  • 3 Stalks Celery – coarsely chopped (including the green leafy portion)

  • Salt (to taste - which is probably on the heavier side - apologies in advance to any cardiologists reading this or treating you)

For the Fillets for Eating

  • 1 Large White Onion - sliced and coarsely chopped

  • 1 Bulb Fennel – white portion coarsely chopped

  • 1 Bouquet Garnis (bay leaf, thyme)

  • 9 Cloves of Garlic - peeled

  • 2 lbs Mussels – rinsed, scrubbed, and cleaned with beards removed

  • 5 Medium to Large Tomatoes – blanched to remove the skin and coarsely chopped

  • 9 Small White Potatoes – peeled and sliced in half

  • 4 Pinches Saffron

For the Croutons

  • Peanut Oil (or you can substitute canola or grape seed oil)

  • 1 Large Baguette – cut in 1/2" thick slices for crouton

  • 1 Clove of Garlic – peeled and sliced in half


For the Rouille

  • 2 Small White Potatoes – peeled and sliced in half

  • 1 tbsp Cayenne Pepper (ground)

  • 1 pinch Saffron Powder

  • 2 Eggs - separated

  • 1 cup Olive Oil

  • 10 Cloves of Garlic - peeled

  • Salt

Directions

Prepare the Mussels

Put mussels in a small stockpot with a small amount of water. Cook over medium heat just until the shells begin to open. Make sure that all mussels open. Remove approximately 2/3 of the mussels from their shells and reserve the remainder in their shells for serving in the Bouillabaisse. Reserve the broth that the mussels were cooked in and add to the Bouillon (stock) below.


Prepare the Bouillon (Fish Fumet or Stock)

Put a generous amount of olive oil into the bottom of a large stock pot. Sweat the leeks, celery, and onions. When the vegetables have almost turned transparent, add the garlic and continue to cook until all vegetables have turned transparent (but not brown). Add the tomatoes and bouquet garnet and quickly stir until thoroughly mixed with the other vegetables. Add the small, bouillon fish (that have been cut into pieces bones and all), reserved mussel broth (from above), and an equal amount of water to the vegetables. Continue to add water until the fish pieces are able to float easily in the water. Add two (2) large pinches of salt (we will re-adjust the seasoning at the end). Cover the stock and let boil for 20 – 30 minutes. When done (fish bones and skin will have almost completely separated), strain the stock through a fine sieve or Chinoise.


Prepare the Base of the Bouillabaisse

In a separate stock pot, put a generous amount of olive oil to coat the bottom of the pan. Sweat the fennel and onions over medium – medium high heat. Add the strained bouillon (from above). Lower the heat to medium. Add the saffron and potatoes and cook in boiling stock for 15 minutes. When the potatoes have cooked, begin to add the Eating Fish. Separate the fish by type and add one at a time so that the fish that will take longer to cook are added first so that all the fish will be done at the same time. When all fish have cooked, remove from heat and taste for seasoning.


Prepare the Croutons

Pour a generous coating of peanut or vegetable oil in the bottom of a large skillet and heat over medium to medium-high heat. Place a layer of the sliced bread in the skillet and toast the slices until the browned. Flip the crouton and toast on the other side. When done, remove the toasted bread from the skillet and rub each side with a clove of garlic. Set the croutons aside to be served with the Bouillabaisse.


Prepare the Rouille

Boil the two small, sliced white potatoes. In a mortar, add the yolks of two eggs, cayenne pepper, saffron powder, garlic, salt, and olive oil (1 teaspoon) and crush together to make a thick paste. Add the potatoes and crush to mix into the paste. In the mortar, continue to mix the paste, gradually adding the rest of the olive oil, until you've created a smooth sauce. If the sauce tends to separate, add another ½ of a potato and keep beating.


To Serve

Serve in individual, flat soup (or pasta) bowls making sure to give each guest a nice selection of the fish and mussels (also, remember to serve the mussels that were reserved - these serve as a garnish to your dish). Float a few of the croutons in the broth and top each with a healthy dollop of the rouille. Serve with a nice dry wine (I like a Cotes du Rhone or Chateauneuf du Papes).


As Always Best Regards and BonAppetIT!!!


TheITGourmet


  • TheITGourmet
  • Dec 22, 2020
  • 3 min read

Updated: Dec 24, 2020


Make this classic challah and hopefully you will find this is one of the easiest and most forgiving challah recipes. Having a freshly baked challah is almost as sacred as Shabbat itself. It is very gratifying to prepare homemade challah in your own kitchen. If you have feared bread baking in your own kitchen, it is actually much easier than you think (this is coming from a guy who traditionally has NOT baked. Fear no more!!! Oh, and here's the good news - this recipe makes two loaves (which is also tradition)!


Note: This recipe can easily be doubled to make 4 loaves instead of 2.


Ingredients

  • 1 1/8 cups lukewarm water (on the warmer side, but NOT extremely hot)

  • 1 Tablespoon dry yeast

  • 1 Tablespoon sugar (I prefer turbinado)

  • 2 cups all-purpose flour

  • 2 1/2 cups bread flour

  • 2 whole eggs + 1 yolk separated, beaten

  • 1 egg white (from the one separated egg above) for glazing (plus 1 to 2 Tablespoons room temperature tap water)

  • 1/2 Tablespoon salt

  • 1/3 Cup sugar

  • 1/3 Cup vegetable oil (I prefer canola oil)

  • Poppy or sesame seeds (optional)

  • Cooking Spray (I prefer canola)

Directions

  1. Proof the yeast by dissolving the yeast in the warm water with 1 tablespoon of the sugar. Mix well and leave to stand 10 minutes, until it froths.

  2. In a very large bowl, lightly beat the eggs. Add the salt, sugar, and oil and beat again. Add the frothy yeast mixture and beat well.

  3. Add the flour gradually (I actually use a stand mixer with the dough hook starting here, but you can do this by hand), and mix just enough to make a soft dough that holds together. Mixing well, first with a large spoon, then working it in with the dough hook (or with your hands if doing it manually).

  4. Knead vigorously for about 10 minutes (perhaps 15 minutes if you are doing it by hand), until it is very smooth and elastic, adding flour if the dough is too sticky (I generally like a pretty sticky dough that is forming some nice gluten).

  5. Pour a little oil in the bowl and turn the dough, so the dough ball gets greased all over.

  6. Cover the bowl with plastic wrap or a damp towel and put it in a warm place to rise for 2‑3 hours, or until it has doubled in size.

  7. Lightly punch the dough down and knead again, then divide into 2 pieces to make 2 loaves.

  8. Divide each loaf into the number of strands you will be braiding and roll each piece of dough into a strand which is approximately 12 - 14 inches in length. Braid challah into desired shape (I'll let you Google this) and place each braided loaf onto a baking sheet lined with parchment paper (or onto a silicone baking mat), leaving plenty of room for each loaf to expand (during rising and baking). Allow them to rise for 1 hour, or until they have approximately doubled in size (usually about 40 - 45 minutes or depending upon temperature and humidity). At this point, I like to gently spray each loaf with some cooking spray and loosely cover with plastic (I like to use a couple of old shopping bags to cover the loaves for the second rise).

  9. Preheat for your over to 350F.

  10. After the loaves have risen, beat the egg whites and 1 or 2 tablespoons of water.

  11. Gently brush the loaves with the beaten egg white / water mixture.

  12. OPTIONAL - If you want to sprinkle with poppy or sesame seeds, brush first with the beaten egg whites (the seeds stick better to the wet loaves).

  13. Bake the loaves in a preheated 350F oven for 25-30 minutes or until the loaves are beautifully golden-brown. They are done if they sound hollow when you tap the bottoms. When baked, immediately transfer the loaves to a wire cooling rack (trust me - you will notice the difference). Resist the urge to cut this bread if it is still hot out of the over. Serve warm (even if this means heating it back up in a warm oven).

NOTE: Here is a picture of some round challahs we made for the High Holidays using the classic 4 strand braided technique.

As Always Best Regards and Bon AppetIT!!!


TheITGourmet


© 2020 by THE I.T. GOURMET. Proudly created with Wix.com

bottom of page